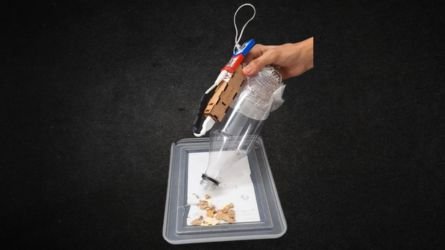
DIY projects with havi elements are always fun. That’s because they are STEM + Arts, that is STEAM. In this blog, we will see how to make a DIY vacuum cleaner model at home.
With the advancement of technology, various machines have made our life easier. Many machines are designed to solve specific human problems. One of them is a vacuum cleaner.
Let’s first understand what a vacuum cleaner is and then will see how to make an easy vacuum cleaner project at home.
What is a vacuum cleaner?
A vacuum cleaner is a machine that sucks small particles of dust and dirt from surfaces like floor, carpet, sofa, car etc. It is an electronic device and uses the concept of air pressure and suction to clean the surface. Mostly, vacuum cleaners are used in domestic applications, but there are industrial applications too.
How to make vacuum cleaner at home?
Now, let’s make a prototype vacuum cleaner using plastic bottles and havi elements. You can make 100+ such STEAM and robotics projects using Havi’s robotics kit for beginners.
Things you need
Elements:
Power
Motor
Accessories:
Power bank with USB cable
Gearless motor
Contact us to get these elements & accessories
Craft material:
Plastic bottle(700 ml colddrink bottle is preferred)
White open weave bandage(Used in first aid kit)
Cardboard
Compass
Cutter & scissors
Double sided tape
The making
Step 1
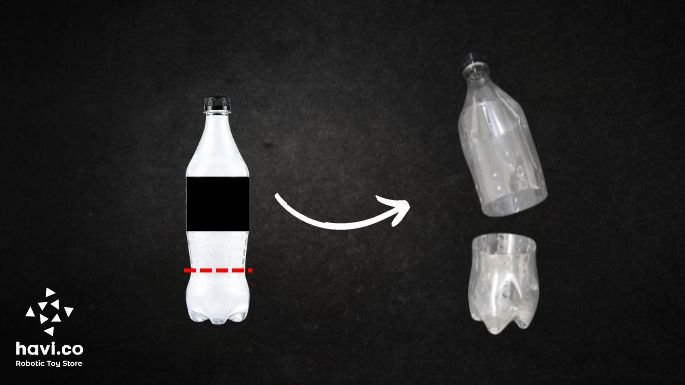
To make the vacuum cleaner at home, first, let’s cut a plastic bottle as defined in the image.
Step 2
Take the bottom part of the bottle. Make one hole at the side and 5 holes at the bottom of the plastic bottle.

Step 3
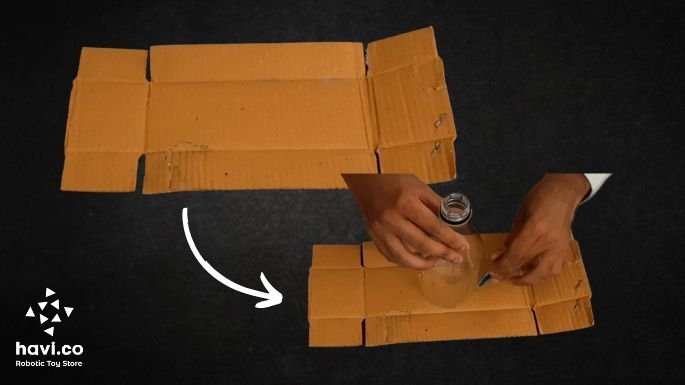
Cut a disc from cardboard that fits tightly into the bottom of the bottle. In the center of the disc, draw a square as per the size of the gearless motor.
Step 4
Cut the triangle shapes at three different places of the disc. Cut the square to fit the gearless motor.


Step 5
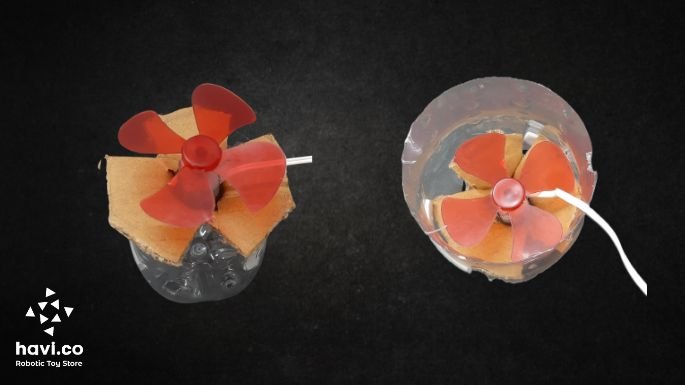
Put the propeller into the shaft of the gearless motor. Fix the gearless motor at the center square of the cardboard piece.

Step 6
Insert the propeller setup into the bottom part of the bottle.
Step 7
Snap the circuit: Power + Motor. Connect the circuit with the powerbank using a USB cable.

Step 8
Stick the circuit over the power bank using double-sided tape or transparent tape.

Step 9
Pass the cable of the gearless motor through the hole of the bottle and connect it with Motor Element.
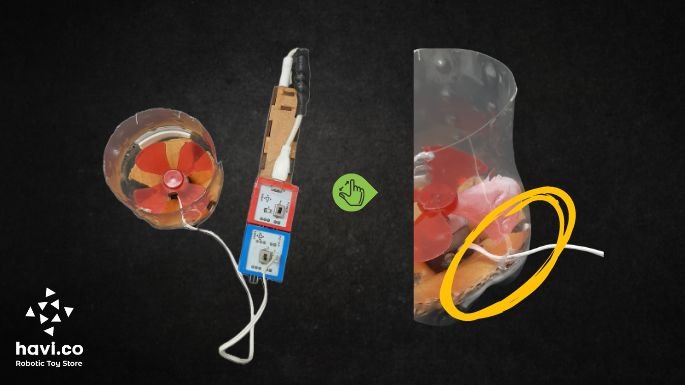
Step 10
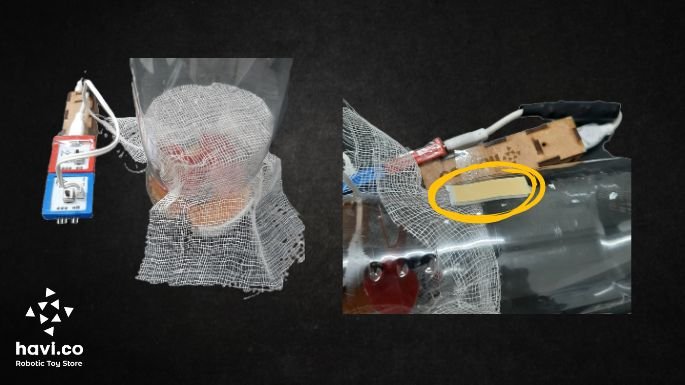
Cover this setup with white open weave bandage piece and fix the other part of the bottle over it.


Step 11
By using double-sided tape, Stick the power bank on the bottle. The vacuum cleaner is ready.
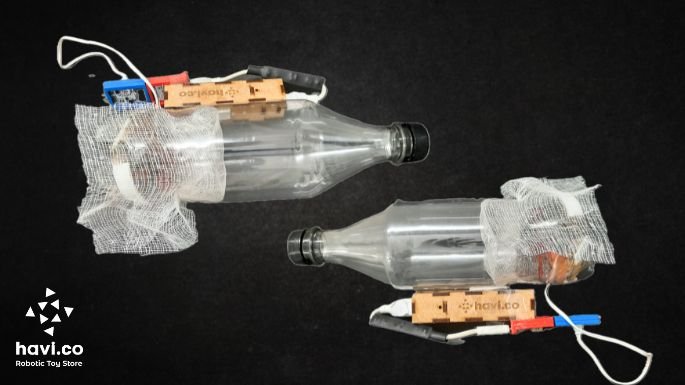
Put some small pieces of paper and keep the opener of the bottle near to it, turn on the circuit and see how your home made vacuum cleaner collects the waste.

How does it work?
The DIY vacuum cleaner project works on the principle of air suction. When we turn ON the circuit, the current flows from power to the motor element and the connected gearless motor starts to rotate. With the gearless motor, the connected propeller spins and creates a suction. The holes at the bottom of the bottle allows the air to pass by and makes the suction enough capable to suck the debris. The bandage works as the collection net.
A question before you start making this DIY vacuum cleaner. What will happen if you use an opaque piece of cloth like a silk handkerchief instead of a bandage which has a net?

