DIY Automatic water dispenser model using Cardboard & Havi Elements
Have you noticed the automatic water bottle fillers in airports or the automatic water taps in malls, theaters, and hotels? These systems address the issue of water wastage while also offering a hygienic solution.
But did you know that you can create a prototype model of that using IR sensors or ultrasonic sensors?
In this blog post, let’s explore how to build a DIY automatic water dispenser project model using Havi’s robotics kit and cardboard. You can use the same model for making coffee or soup or lemonade dispenser as well. A STEAM project to execute in your science fairs.
What is automatic water dispenser?
Automatic water dispensers are machines that dispense water automatically when a bottle, glass, or object is nearby the dispenser outlet. They fetch water from pre-storage cans and dispense it when an object is nearby.
How to make an automatic water dispenser project?
What do you need?
Elements:
- Power
- Motor
- IR pair
Accessories:
- Submersible pump
- Power bank with usb cable
- 3-pin cable
Contact us to get these elements & accessories.
Craft material
- Disposable water bottle
- Card board
- Cutter
- Scissor
- Scale
- Pensil
- Glue
- Double-sided tape
The making
1. The dispenser model
Step: 1
Cut a disposable water bottle at the filler part. Then, cut a small rectangular slot from the open part of the bottle.
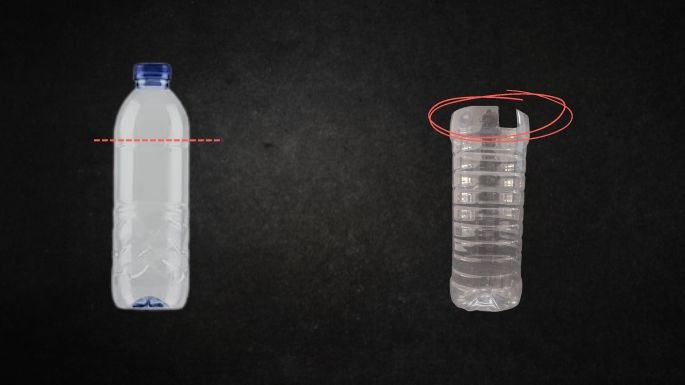
Place the submersible pump into the open bottle as defined.

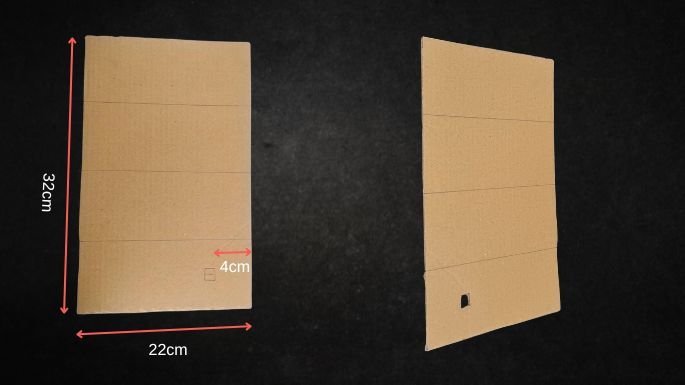
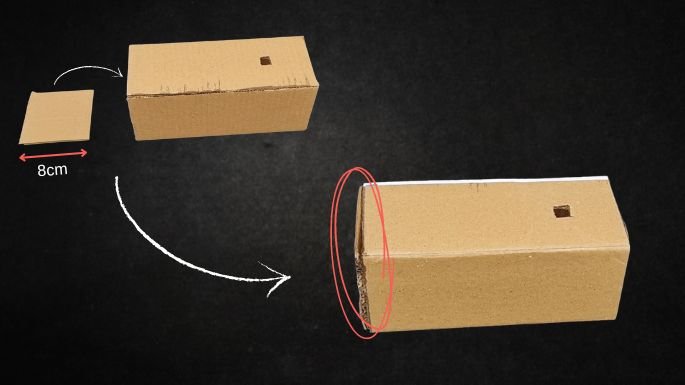
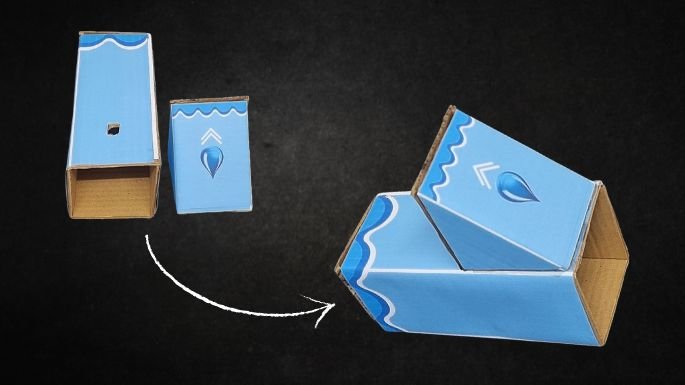
Draw equal slots on the cardboard using a pencil. Then, cut a square as defined in the image.
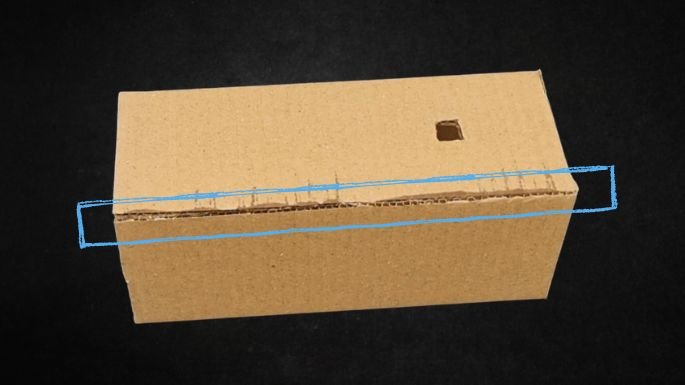
Fold the cardboard from pencil marks to create a box shape. Use glue to stick the edges of the box together securely.
Next, cut another square from cardboard and affix it over one side of the box in a manner that it covers one end of the box completely.
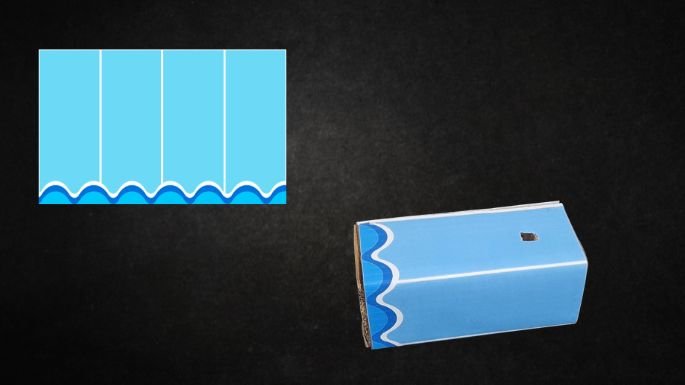
Download the template provided. Cut & stick it over the box. There are two different templates provided. One for water dispenser model and another for coffee dispenser machine. You can use whichever you like.
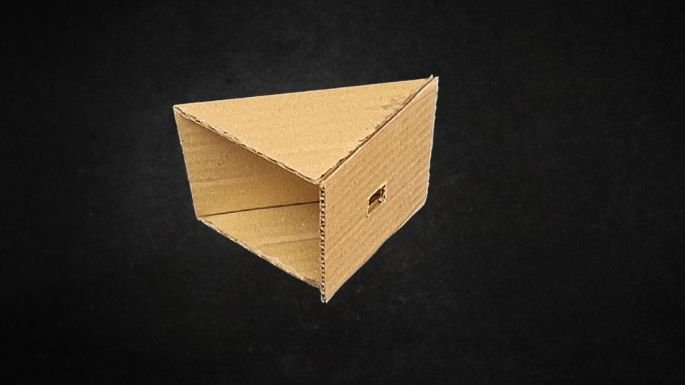
Now, Cut a cardboard piece into a hexagon shape. Fold the board as defined.

Cut a square piece of cardboard and then make a small square slot as specified.

Stick the square shaped piece onto the hexagon piece.
Cut & stick the provided template over it.
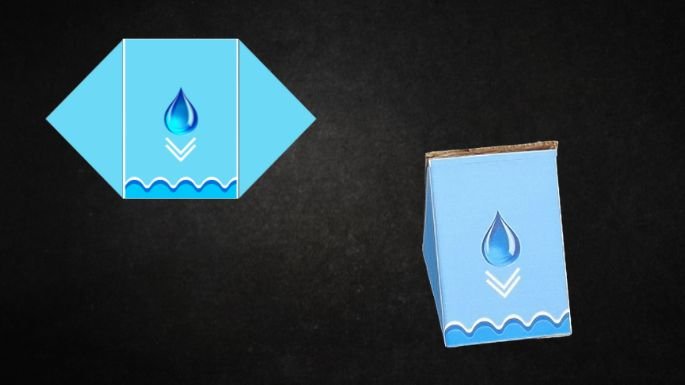
Attach the small hexagon part onto the box we made earlier.
Step 12
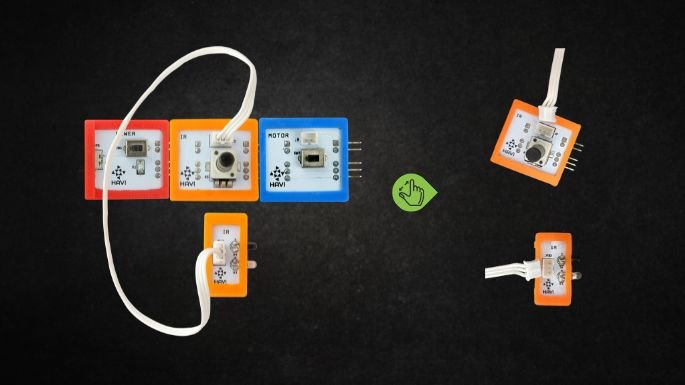
Snap the circuit: Power + IR + Motor. Connect IR pair with 3-pin cable.
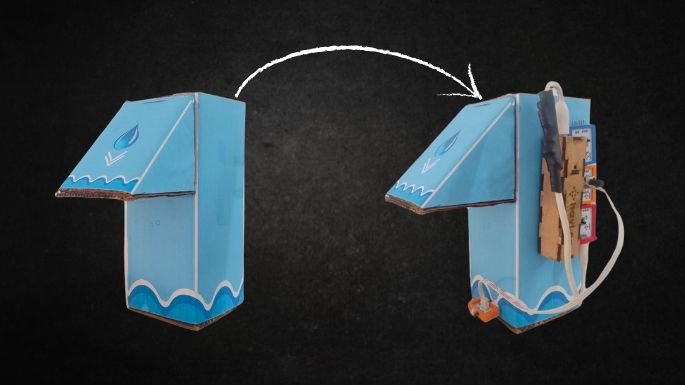
Connect the power bank to the circuit using a USB cable. Affix the circuit and power bank onto the box using double-sided tape.
Place the bottle into the box.
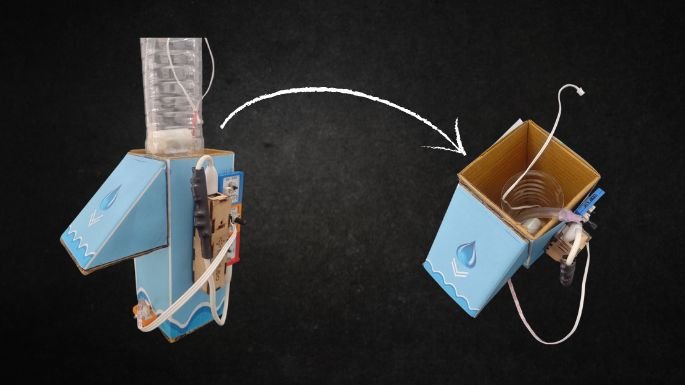
Pass the water pump nozzle through the square slot of the box. Note the placement of the small IR sensor. Connect the water pump with Motor Element.
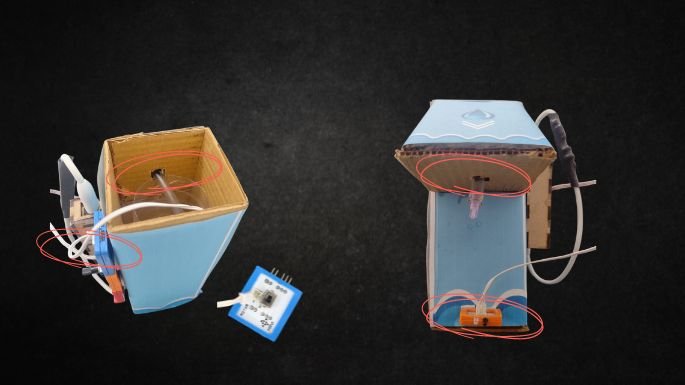
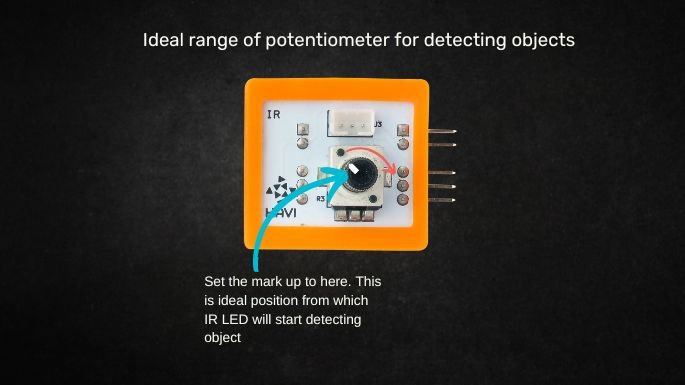
Adjust the potentiometer of the IR Element to the middle position so that the sensor can detect the glass at an adequate distance.
Fill the bottle with water. Water should not touch the power bank or circuit.
Step 18
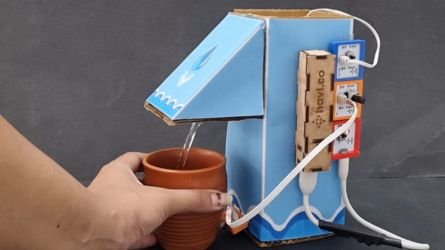
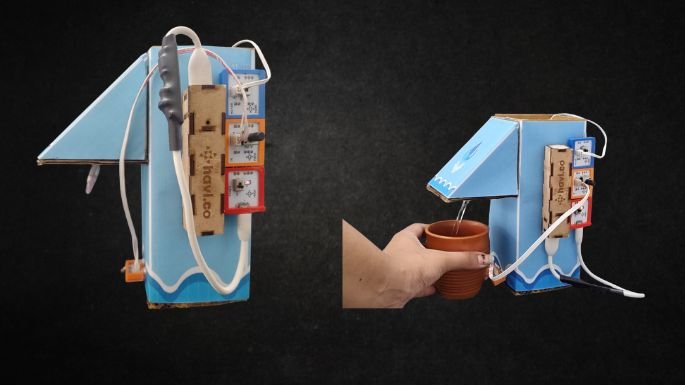
Turn the power ON. Keep a glass near the water dispense outlet(i.e. water pump nozzle).
How does it work?
Here, the water dispenses automatically when the glass is near IR LED and stops when glass is far away from IR LED.
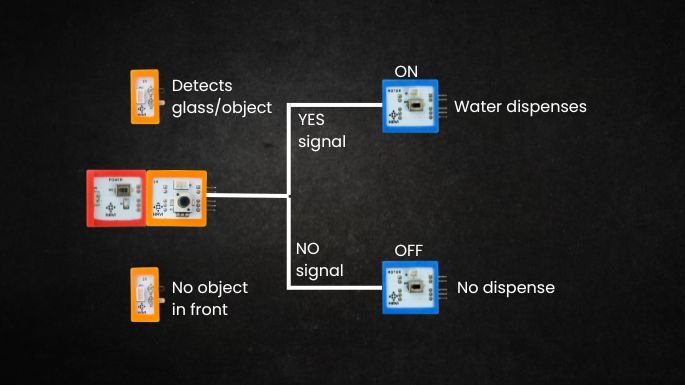
Hence, when no object(here, glass) is near IR LED, IR Element passes NO signal to connected Motor Element, hence the pump won’t dispense water. When an object is near an IR LED, IR Element passes a YES signal to the connected Motor Element, hence the pump dispenses water.
So, be ready to prepare this project to present in your upcoming science fair. This could be one of the benchmark projects in the “Save water” category & smart home solutions.
Contact us to get customized pack to make this project.